
So as much as I LOVE to bake, I must say, I do not bake many pies. My husband absolutely loves apple pie, especially in the Fall. So when he bought me an adorable red pie dish, pie crust protector and rolling pin accessories, I was motivated for pie! First of all, please take a look at this oh so cute ceramic pie dish Martha came out with this year (and yes, we are on a first name basis), I just can't get enough of it!
Ok so let's get to it...unfortunately I have the smallest kitchen known to mankind and therefore I am not able to display all of my big kitchen accessories out on the counter top. So when I get this guy out, you know I am serious about making something! You definitely don't have to have a food processor to make the pie crust, I made it in my kitchen aid stand mixer before I had this guy, but trust me, he helps.

To start this whole process, you have got to get your dough started. The recipe I used for both the dough and the filling can be found on the inner aspect of the pie dish. So here is the recipe for the dough...


cute right?
Here are some pics to lead you through the process:

pulse dry ingredients together


Butter anyone? Now you see it is like little balls of butter coated in the flour mixture.

Like my new rolling pin accessories, I LOVE these things! Again, Martha made them. Roll out each disk to about a 12" round. Place one in your pie dish and leave the other one flat on a cookie sheet, chill for 30 minutes.

Chill this...
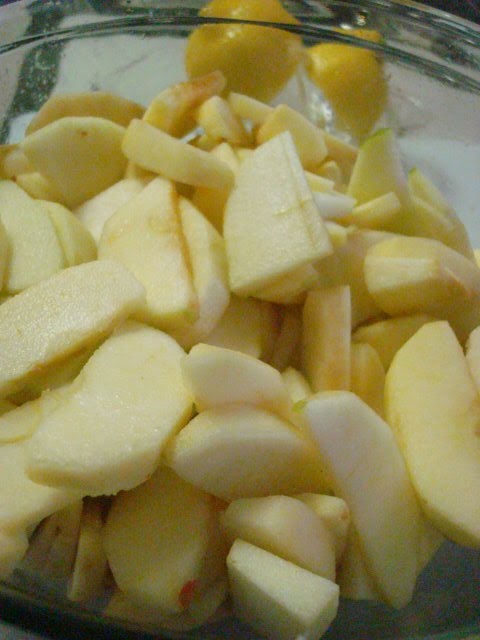
Now that your crust is chilling, you can start on the apples. You should have 3lbs of apples, I used a mixed variety: Granny Smith, Gala, and Pink Ladies. Peel them, core them, and slice them into 1/4" slices.

Place them in a bowl, sprinkle with 2 tablespoons of lemon juice. Then in a small bowl mix together 3 tbsp. flour, 1 tsp. sugar, 1/4 tsp. salt, 1 tsp. cinnamon, and 1/4 tsp. ground nutmeg. Sprinkle this mixture over the apples and stir until well combined.

Place the apples in your chilled pie crust, place 1 tbsp. butter divided into small pieces over the apples. Place the flat 12" circle of dough on top of the apples, pinch the dough together.

Next make your egg wash: 1 egg yolk + 1 tbsp. heavy cream, wisk til combined.


Brush the top of your pie with the egg wash. Then cut out 3 vents in the center of the pie. Place on a cookie sheet lined in foil (to catch spills).
Bake at 450 degrees for 20 minutes, then reduce temp to 375 and bake for an additional 50 minutes. Be careful not to allow the crust to burn...this is where my new crust protector came in handy (you can also use foil). I placed it on after the first 20 minutes of baking. Remove the pie from the oven and let sit for a couple hours to cool.
So after I finished baking my beautiful pie, I left it on the counter to cool and I made a quick trip to Target. When I got home and went to upload my pics to my blog, I found this picture awaiting me. My hubby was soooooo excited when he got home this evening to find an apple pie that he snapped this adorable pic to tell me thank you, isn't he precious! I think so!

Now all you have to do is make some homemade whipped cream (heavy whipping cream whipped until semi-stiff + 2 tbsp. confectioners sugar folded in at the end.) Place a healthy piece of pie on your plate with a large dollop of whipped cream and sit down to enjoy a good book or TV show.


Yummy!
Just one more thing...as much as I bake, I still have a soft spot for Trader Joe's sweets. The next time you stop in to TJ's make sure you pick up some of these guys...S'mores! Pop them in the microwave for 5 seconds and the next thing you know, you are sitting beside the campfire! So good and just had to share them with you! Happy Baking...Happier Eating!

Hi Linzy!
ReplyDeleteThanks for all of your helpful suggestions for eliminating those pesky indents and air bubbles in the royal icing! I will have to try beating it longer. I have followed sweetopia's recipe to the T, so I usually only beat 10 minutes. I will try adding a few minutes. Another question... I know sweetopia likes to add water to her frosting after beating (b/c she uses the same consistency for flooding and piping). Do you do that as well? I had tried that in the past and it worked a few times, but then I thought it caused more indents. Also if you do add water...do you just mix it in at that point with a rubber spatula or do you turn your mixer on to mix it? Sorry so many questions....but it's always nice to get advice...b/c yes...it can be terribly frustrating to get those air bubbles and indents:)
Also....a friend of mine is a photographer ( I bake cookies for her sessions)...and she is wonderful at designing logos and blogs. Her photography blog is called cookieclicksphotography.com...and her name is Nance. She is a fabulous person and sooo sweet!! Thanks again for your help.....I'm so glad I found your blog!!!!
Wow... thanks so much....I won't bug you with anymore questions today!!! Just had to tell you... that I do my frosting (piping ) and then flooding generally with bottles JUST like you do. I, too, tried doing the same consistency for both...but it didn't work for me either:)
ReplyDeletePS...did you change your blog layout already? It looks great!!!
Okay I lied...last question tonite... I promise...when you beat your icing....do you do it on a slow speed like Marian suggests or do you beat it at a higher speed. I usually beat mine for 10 minutes at the slowest speed (stir) on my mixer....now I will try doing it for about 12 minutes...but wondered if you beat your more quickly. I know that Brigid at Bake at 350.blogspot.com beats her recipe at a high speed for 5 min.
ReplyDelete