
Ok so, I have posted my jungle cookies before but I thought it would be fun to do a quick tutorial on how I make the most interesting one...in my opinion of course...the lion!
First off you need the cookie cutter. I have the 3-piece jungle theme by Wilton because I seem to like faces more than the entire body, but I am sure you could use some of what I do even if you have a full body lion cutter. That statement just sounds so funny!
Anyway...bake off your cookies (I love when Paula Dean says that, must be a Southern thing...man I so wish I were from the South!), let cool, make royal icing etc. you know the drill.
Now for the deets...
- As for the colors you will need:
- golden yellow flood icing: equal parts gold and lemon yellow for the face
- light pink flood icing: small amount for the ears
- chocolate brown really thick piping icing: for any cookies that I have a lot of texture or detail on, I always use really thick royal icing. I make my normal batch of RI, take out the amount I need for the thick icing, color it, and then add a little extra powdered sugar (by hand) until it makes stiff peaks.
- white piping icing for the eyes
- black piping icing for the pupils and mouth


Notice that it does not matter if the yellow is perfectly uniform
because the edges will be covered with the mane.
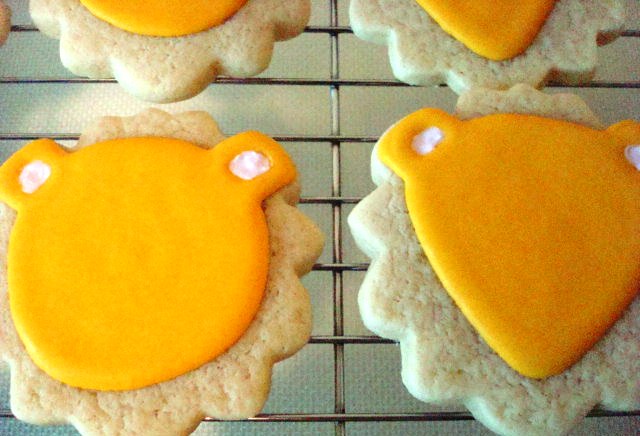
Now put your pink accents in the ears, yes I know it looks
like white, but I assure you it is pink.

With your really thick brown icing fitted with an open star tip (I use #22) start piping the mane.

Go all the way around (skipping the ears) sometimes on the bottom I add
two layers of mane, just depends how it looks to my eye once it is on. If it
is too sparse I add another if it looks good, I leave it!

Now take a closed star tip (I use #16) and fill in the ear areas with mane. I have tried
it with the larger open star tip and it really does not look as good.


Put on his face...nose first, dry, eyes, dry, mouth, dry, done!
{yes this guy is different than the one I showed in the tutorial because the pic
I took of the final tutorial lion turned out really grainy}
Well all, hope you enjoy making these lions as much as I do, and beware when you make them, they all have a little personality of their own.
Happy Baking, Happier Eating!
Super cute! I love the jungle animal faces too! They are so much fun
ReplyDeleteThanks for the tips :)
Thanks for the tutorial! Very cute lions:)
ReplyDeleteThanks you guys! Glad you like them!
ReplyDelete